Custom Events
Custom events are a way to track specific actions or interactions that occur in your application. They are extremely flexible, and can be used to track any event you'd like.
This guide contains best practices for naming and using custom events.
For the API usage of custom events, please refer to the Custom Events docs.
How to send a Custom Event
There are two parts to custom events, the event name itself, and the custom event attributes.
For example, let's say we we want to log a custom event when a user opens their wallet. Let's call it something like "wallet opened". The way we could track that custom event is by using the sdk.event() method.
React Example
import { useArcxAnalytics } from '@0xarc-io/analytics'

const Component = () => {
  const sdk = useArcxAnalytics()

  const handleClick = async () => {
    await sdk.event('WALLET_OPENED', {
      metadata: {
        apiVersion: 'v1',
      },
    })
  }

  return <button onClick={handleClick}>Open Wallet</button>
}
You can see that we used the sdk.event() method to log the custom event.
-
The first string argument
'WALLET_OPENED'is the custom event name, and we can name it anything we want. -
The second argument is an optional object of custom event attributes, which are arbitrary key-value pairs that you can use to add any additional information about the events. In this example we attached the
apiVersionattribute to the event, but it could be anything we want.
JS Example
- See here for the JS example.
When to use custom events vs the SDK event methods
Note that regardless of whether you decide to use Custom Events or not, you must implement both the Wallet Connection and Transaction events for the SDK tracking to properly work. See the React and JS guides for more information.
As seen on the Manual Tracking pages, we have provided a handful of convenience methods for logging common events: Page, Wallet Connection, Chain Change, Transaction, and Signature Events.
These events may not necessarily exhaust all the events that you want to track.
If you want more granular control over the events you track, you can use custom events which are extremely flexible.
For an example of how to use custom events for more granular coverage, see the Transactions guide.
For best practices on naming events and creating funnels, see below.
Naming events
There are no strict rules on how to name custom events, but here are some best practices:
Consistency
No matter which naming conventions you choose to use for your custom events, it is important to be consistent. Consistent naming makes it easier to track event behaviour over time and understand your data.
If event names are inconsistent or change often, it becomes difficult to understand the data and the meaning of the events.
Casing
The recommended approach to casing for events is to use capitalized snake_case for the event name, and camelCase for the event attribute keys:
- Event name: "deposit attempted" becomes
DEPOSIT_ATTEMPTED - Event attributes:
- "transaction hash" becomes
transactionHash - "chain ID" becomes
chainId
- "transaction hash" becomes
By using capitalized snake_case for the event name, it appears more readable, indicates that it's a constant and that it's value does not change over time.
Use Noun-Verb Structure for Custom Event Names
When naming events, use a noun-verb structure rather than a verb-noun structure. This makes it easier to group the actions by event or noun type.
| Event | ✅ Good naming (noun-verb) | ❌ Bad naming (verb-noun) |
|---|---|---|
| Wallet opened | WALLET_OPENED | OPENED_WALLET |
| Stake submitted | STAKE_SUBMITTED | SUBMITTED_STAKE |
| Swap clicked | SWAP_CLICKED | CLICKED_SWAP |
| Buy clicked | BUY_CLICKED | CLICKED_BUY |
| Sell clicked | SELL_CLICKED | CLICKED_SELL |
| Withdraw clicked | WITHDRAW_CLICKED | CLICKED_WITHDRAW |
As you can see, noun-verb structure makes it easier to group and analyze related events together.
Custom Events and funnels
A powerful benefit of custom events is that they can be used to create funnels.
Funnel are a way to track the user journey through your application, and see the drop-off rate at each step.
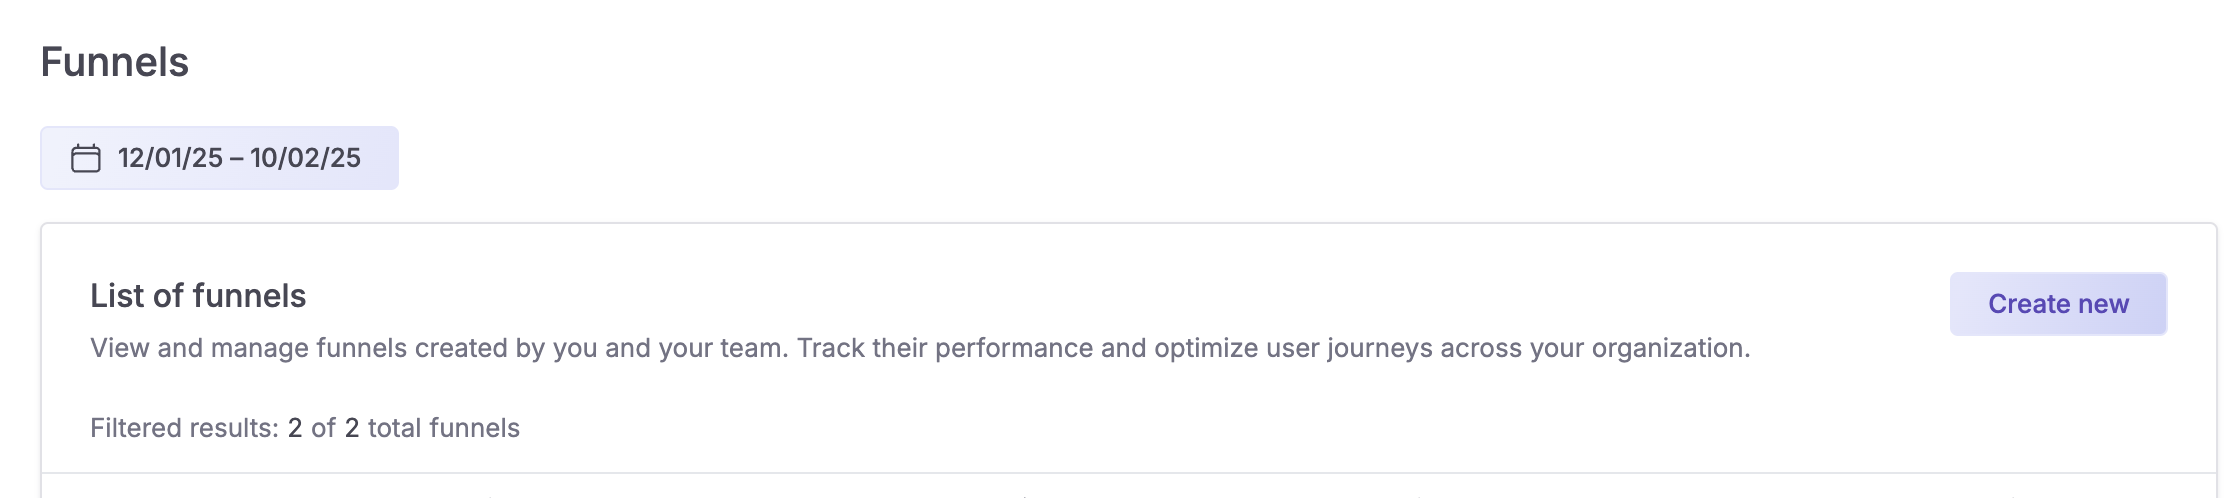
Step 1. Create a funnel
To create a funnel in the 0xArc app, visit the funnels page and click the "Create funnel" button.
Step 2. Add custom events to the funnel
You can use the custom events you've emitted as the steps in the funnel.
For example, in the image below, we click "Select condition" -> "Events" -> "Custom" -> and then in the list, we see the custom events we've emitted. Note that this list is limited to 10, and the input allows you to search our database for all custom events, by custom event name.
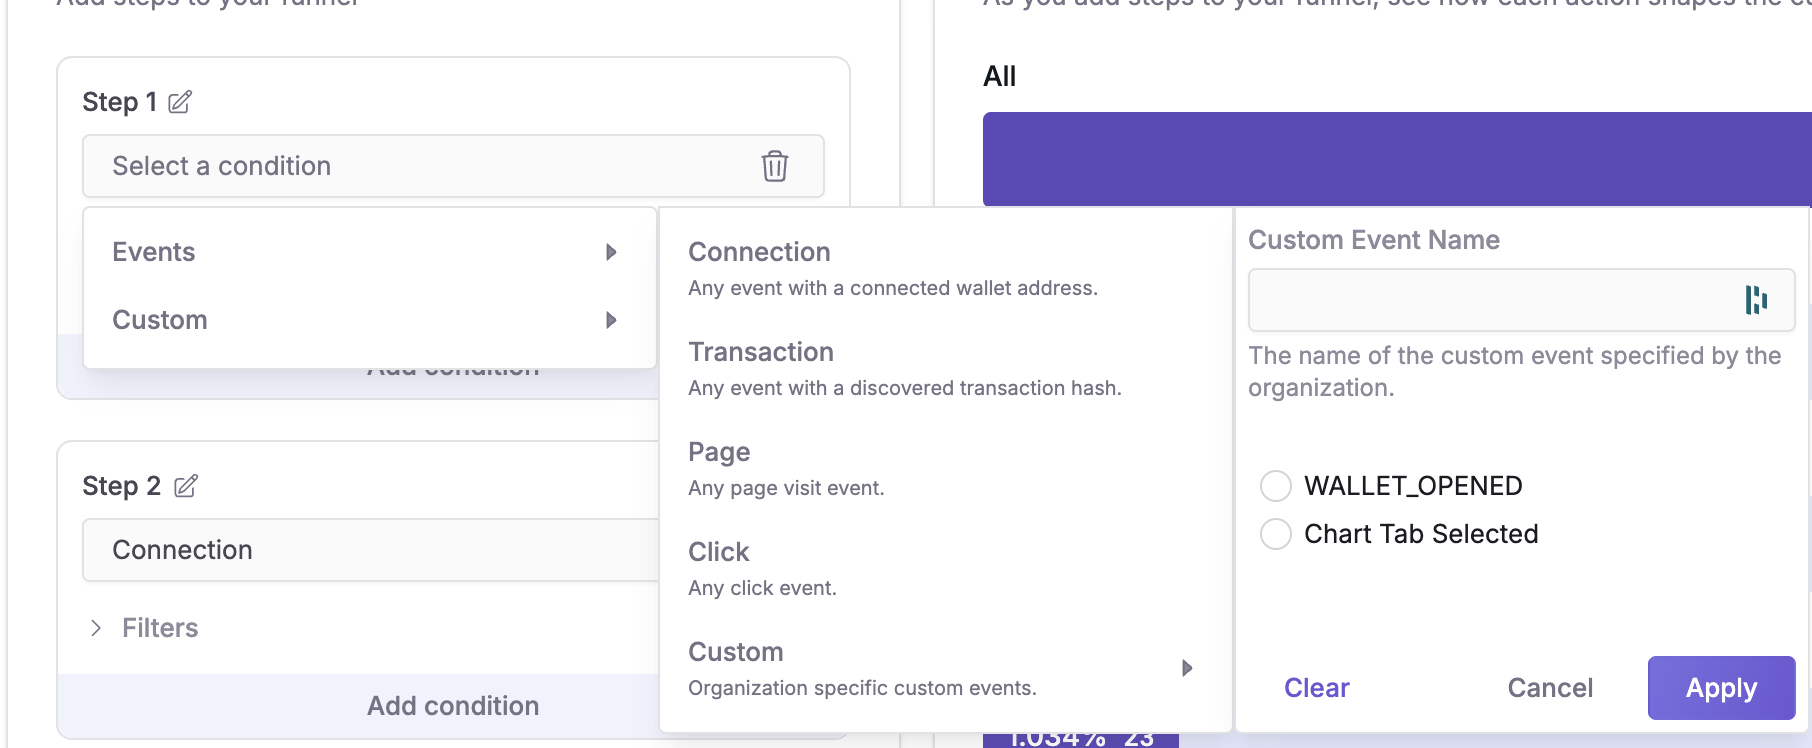
We see here that our 2 events are WALLET_OPENED, and Chart Tab Selected.
Step 3. Apply the event
After you select an event and click "Apply", you can see the funnel in action.
On the right, you will see a count of how many users have taken the action in your app which triggered that custom event.
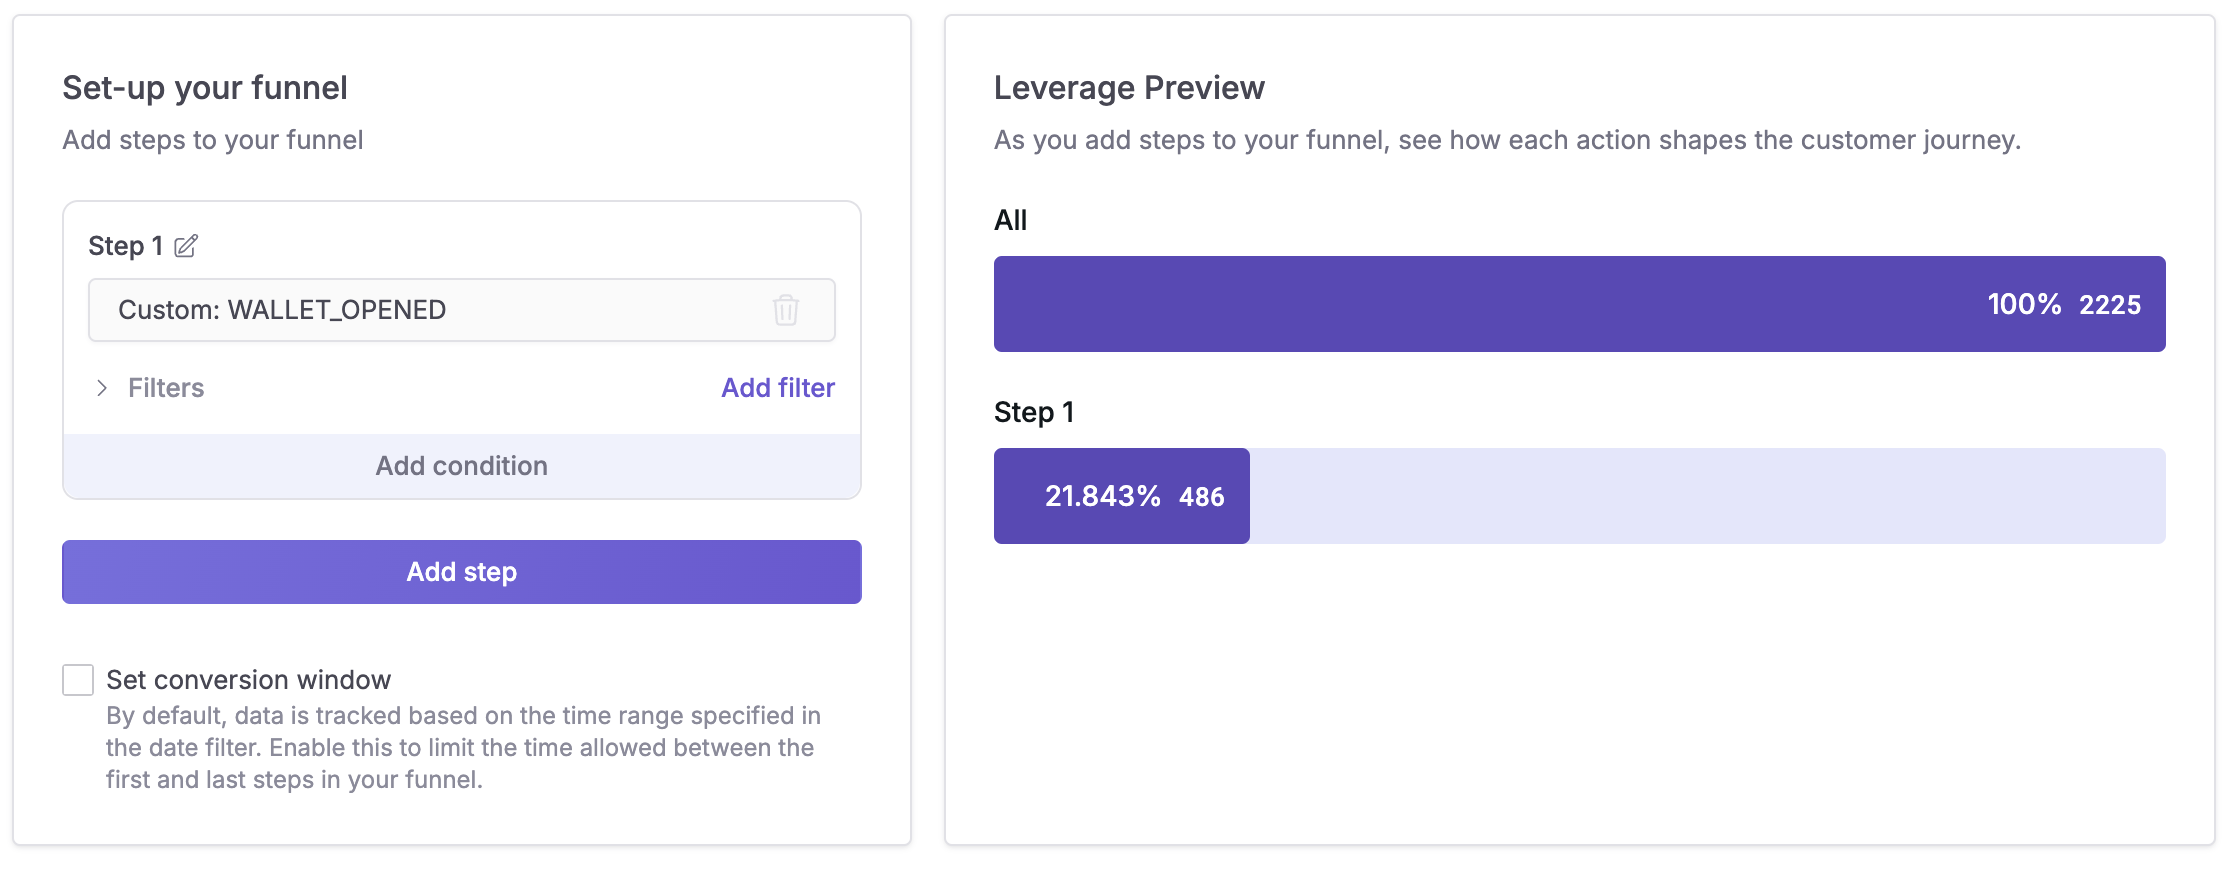
In our case, we can see that 486 wallet open events were captured.
Step 4. Filter the custom event by attribute
Now that we have our custom event in the funnel, we can filter that event by key-value pairs of the custom event attributes.
For example below, we filter the event by the apiVersion attribute, and check that the apiVersion is equal to 2.
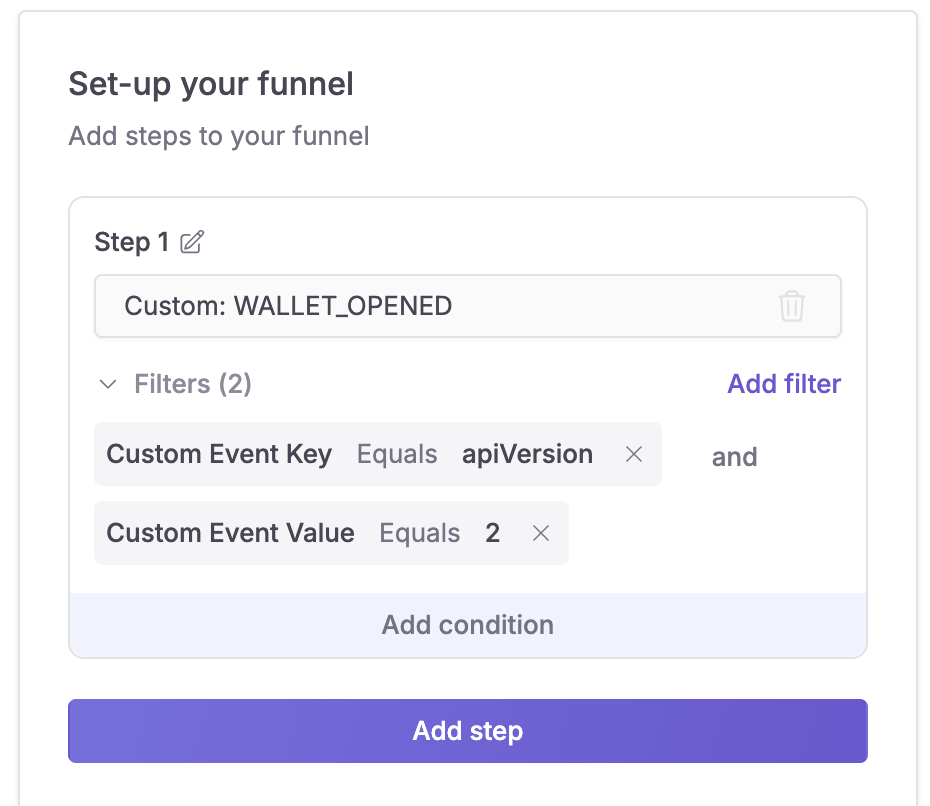
Note that if you want to filter by a custom event attribute, you can either:
- Add both a "Custom Event Key" and a "Custom Event Value" filter, which will filter the funnel to only show events where the "Custom Event Key" is present and equal to "Custom Event Value".
- Add only a "Custom Event Key" filter, in which case the funnel will show the count of events where the "Custom Event Key" is present, regardless of what value it is.
We do not support adding only a "Custom Event Value" filter, since values must match a Custom Event Key.